Mount Wellington and MONA make an unlikely but rewarding pair: first, a cold, high lookout over Hobart; later, a museum that can be playful, unsettling or simply not to your taste. This seven-hour tour links them by coach and ferry, so you can cover two very different sides of the city in one day.
I like the contrast between the open summit views and the Organ Pipes, then the Derwent River approach to MONA. I also like that museum entry, the return ferry and an O device are included, leaving you free to focus on the art rather than sorting out each leg yourself.
The trade-off is time. MONA is large and personal in its appeal, and you may want longer there than the schedule allows. The summit is also weather-dependent, while the hotel-pickup information is unclear, so plan to meet at Brooke Street Pier unless you have confirmed pickup directly.
- At a glance
- A morning from the city to the summit
- From Brooke Street Pier to MONA by ferry
- How to make the most of MONA
- Guides, timing and what the price covers
- Who should choose this tour?
- Practical details before you book
- Should you book this Mount Wellington and MONA tour?
- FAQ
- How long is the tour?
- Where does the tour depart and return?
- What is included in the tour?
- Are meals and drinks included?
- Is hotel pickup available?
- Can I bring a stroller or use a wheelchair?
- What happens if the tour is cancelled or I need to cancel?
At a glance
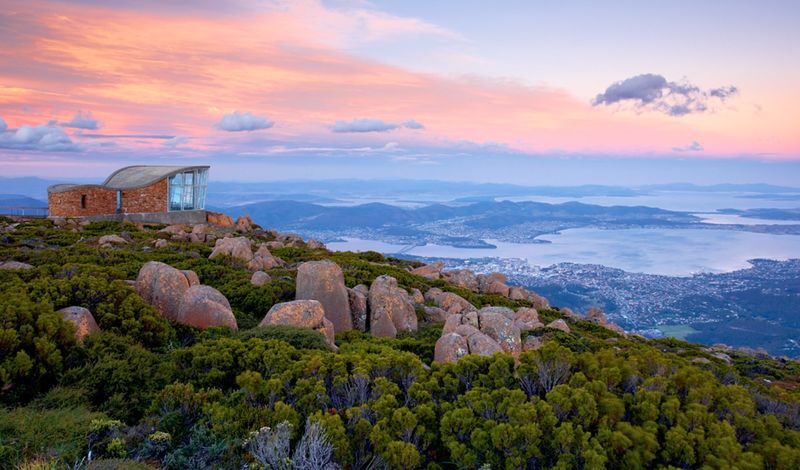
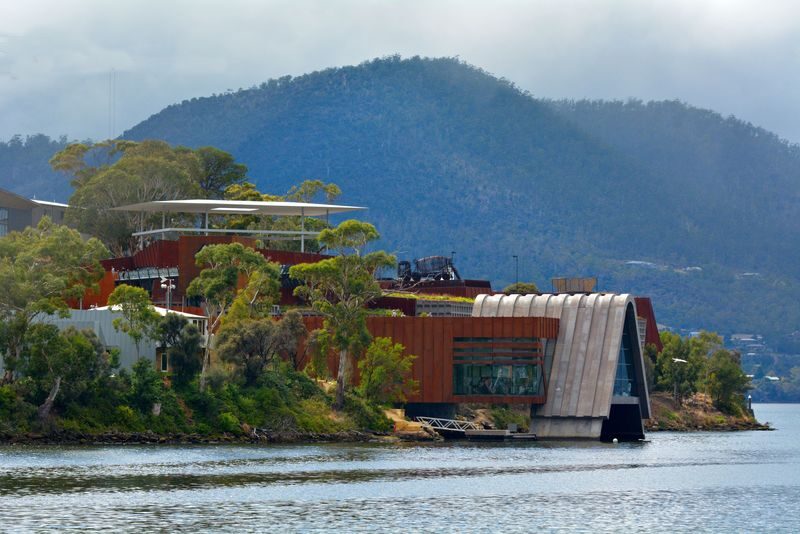
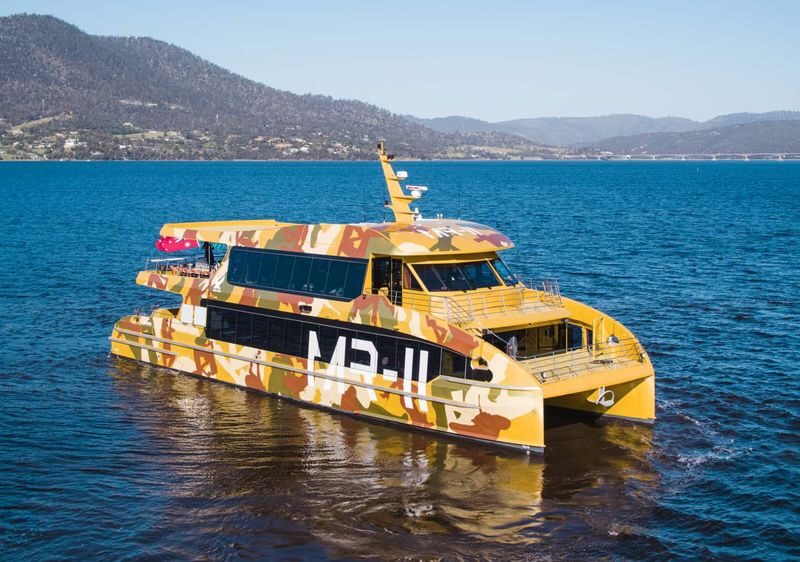
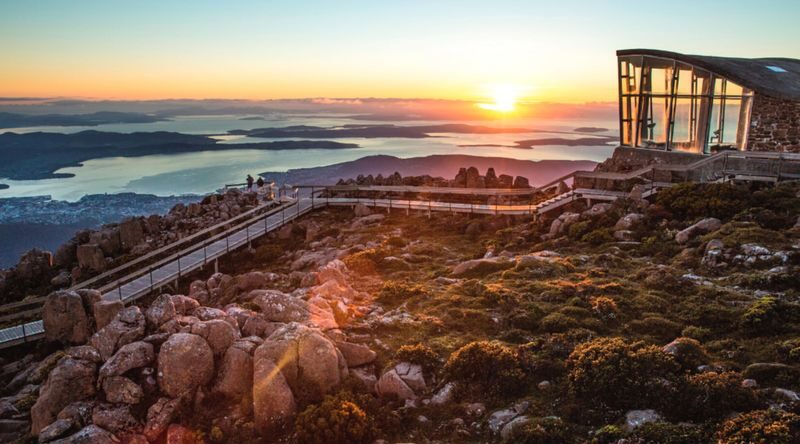
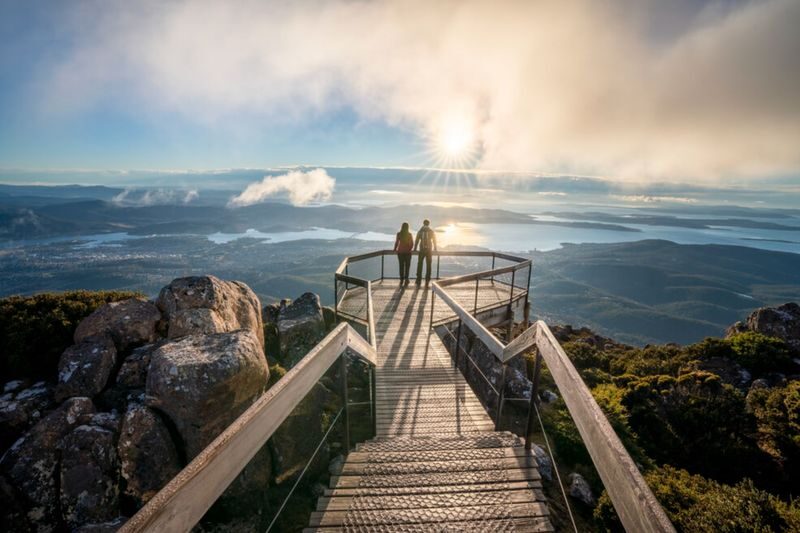
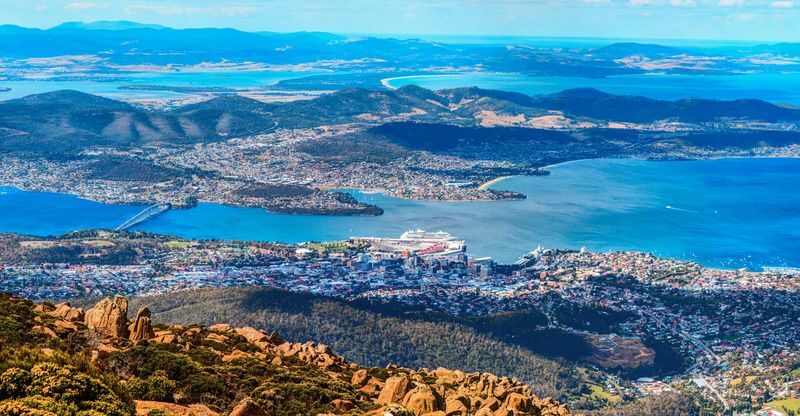
- Mount Wellington comes first: Travel by coach to the summit, with a guided walk toward the observatory and views of Hobart when conditions are clear.
- The Organ Pipes are a striking feature: These rock columns are among the mountain’s most distinctive sights.
- The ferry is part of the day: Cruise the Derwent River between Brooke Street Pier and MONA, with views of the coastline and surrounding hills.
- MONA entry is included: You get free time to explore ancient, modern and contemporary art, plus an O device.
- The day runs about seven hours: Departure is listed for 9:15 am, with a 4:30 pm return to Brooke Street Pier.
- Food costs extra: You can buy a meal or drink at MONA, but it is not included in the tour price.
A morning from the city to the summit
The tour starts at Brooke Street Pier in Hobart at 9:15 am. Arrive 15 minutes early: late arrivals and no-shows are not refundable, and the meeting point is the pier, not Mount Wellington.
From there, a coach takes you up Mount Wellington. The drive itself is a major part of the outing, as the city gives way to the mountain’s alpine environment. At the top, clear weather can open up a wide view across Hobart and its surroundings. Several people have singled out the drive and summit as the day’s best part, and the guide’s commentary helps give the ride some shape beyond simply getting to the top.
The summit is exposed, and conditions can be cold and windy even when the sun is out. One visitor described a bright day with a chilly wind, a useful reminder to bring warm layers rather than judging the mountain by the weather down in Hobart. Visibility is not guaranteed, either. The tour promises the chance to see the panorama on clear days, not a view on demand.
A guided walk toward the observatory adds a little time outside the coach and a closer look at the high-country setting. The Organ Pipes, a formation of upright rock columns, are another reason to look beyond the city view. The precise time spent on the mountain is not specified, so think of this as a guided visit rather than a long hike.
From Brooke Street Pier to MONA by ferry
After the mountain visit, the tour returns to Brooke Street Pier for the ferry to MONA. This change of pace is part of the appeal. You leave the road behind, follow the Derwent River past its coastline and surrounding hills, and arrive at the museum by water.
The ferry ride is not just a transfer. It gives you a fresh view of the area and a moment to rest before the museum. On the approach, look for MONA’s dramatic structures near the entrance. The arrival sets up the shift in mood: from Hobart’s broad natural views to art that may ask awkward questions or refuse to explain itself.
Your return ferry ticket is included, and the tour ends back at Brooke Street Pier at about 4:30 pm. There is no hotel drop-off after the tour. The schedule can change with traffic and weather, so avoid arranging a tight connection or an important appointment immediately afterward.
How to make the most of MONA
MONA is the day’s wildcard. Its collection brings together ancient, modern and contemporary art, with exhibitions and installations that can be thought-provoking, strange or challenging. That range is exactly why the museum appeals to some people and disappoints others. If you prefer a museum with a clear timeline and familiar explanations, MONA may not be your ideal stop. If you enjoy making your own sense of art, give it room to surprise you.
The included O device is there to support your visit. You have free time to explore, but the tour does not specify a guided museum tour or a set route through the galleries. That freedom is useful if you already know what interests you, though it can make the visit feel brief if you want to take in everything.
Plan your priorities as you go. You might choose a few exhibitions that catch your attention rather than trying to see every room. Some people find they could happily spend longer at MONA, so this outing works best if you are content with an introduction rather than an exhaustive museum day.
Food is available at The Source Restaurant, the museum café or a wine bar, but meals and drinks are at your own expense. With the return ferry and 4:30 pm finish in mind, keep an eye on the time if you stop for lunch. A meal here is a pleasant option, not part of the package.
Guides, timing and what the price covers
The guide can make a real difference on the mountain drive, where context and calm commentary help you appreciate the road and the views. Bas has been praised for an enthusiastic style, while other guide feedback highlights informative commentary and a reassuring manner. Guide assignments can vary, but the tour includes an English-speaking professional driver-guide and live commentary on board.
The schedule is designed to connect a coach trip and a ferry outing without asking you to plan each transfer yourself. That is valuable if you have limited time in Hobart and want both the summit and MONA in one day. The listed duration is seven hours, with a detailed schedule showing 9:15 am to 4:30 pm, or seven hours and 15 minutes. Treat the day as a full outing, not a quick half-day stop.
The advertised starting price is $122.85, while the package details also show a starting price of US$106.80. Since the displayed amounts use different currency formats, check the final price and currency before booking. The main value is the combination: coach transport to Mount Wellington, the Derwent River cruise, MONA admission, a return ferry ticket and the O device are included.
You will still need to budget for meals, beverages and personal expenses. There is no hotel drop-off, and the pickup details deserve a closer look. The meeting instructions name Brooke Street Pier as the departure point, while the included-services wording refers to hotel pickup only. A customer has also reported that pickup was not provided. I would not build my morning around hotel pickup unless the operator has confirmed it; make a clear plan to reach the pier.
Who should choose this tour?
This outing suits you if you want to see Hobart from above and from the river, and you are curious about MONA. It is especially practical if you have one day to combine the mountain and museum without arranging separate transport and ferry tickets. The guided drive and live commentary also make the summit visit easier to follow than a self-planned trip.
It is a less natural fit if you want a long walk on Mount Wellington, an unhurried day at MONA, or a tightly structured museum tour. The mountain stop is a visit with a guided walk, and museum time is free time rather than a guided gallery program. If MONA is your main reason for going, consider whether you would rather visit on your own and spend as long as you like.
The museum is also a matter of taste. One person’s fascinating installation can be another person’s baffling room. That is not a flaw in the tour, but it does mean the package is stronger for curious visitors than for anyone expecting a conventional art museum.
Practical details before you book
The tour runs on Fridays, Saturdays and Mondays, from 9:15 am to 4:30 pm. The listed meeting place is Brooke Street Pier, 12 Franklin Wharf, Hobart. Bring your mobile voucher and arrive 15 minutes before departure.
Children aged 0 to 3 travel free, but infants and children must still be included in the passenger headcount. Children aged 18 and older pay the adult rate. The activity is not wheelchair-accessible or stroller-accessible, so it is not suitable if either is essential for your day.
Weather or other unforeseen conditions can lead the operator to cancel. In that case, you can reschedule or request a full refund. You can also get a full refund if you cancel at least 24 hours before the activity date, using local time. Late arrival and no-shows are not refundable.
Should you book this Mount Wellington and MONA tour?
I would book it if you want a varied day and are happy to treat MONA as an open-ended visit rather than a museum you must finish. The mountain drive, summit views, Organ Pipes and river cruise give the day a strong sense of place, while the included museum entry makes the price easier to justify.
I would skip it if you want more time at MONA than a combined day can offer, or if uncertain weather would make the mountain a poor bet. Before booking, confirm the pickup question and check the final price currency. If the pier is your starting point and the schedule suits you, this is a convenient way to connect Hobart’s big natural view with its most unconventional museum.
MONA Boat Cruise and Mt Wellington Morning Tour
“Overall it was good, Bas was really an enthusiatic guide!”
FAQ
How long is the tour?
The tour is listed as seven hours, with a schedule from 9:15 am to 4:30 pm, or seven hours and 15 minutes.
Where does the tour depart and return?
It departs from Brooke Street Pier, 12 Franklin Wharf, Hobart, and returns to Brooke Street Pier at about 4:30 pm. Arrive 15 minutes before departure.
What is included in the tour?
The package includes an English-speaking professional driver-guide, live commentary, the Mount Wellington visit, a Derwent River cruise, MONA entry, a return ferry ticket, an O device and free time to explore.
Are meals and drinks included?
No. Meals and beverages are extra. At MONA, food and drink options include The Source Restaurant, the museum café and a wine bar.
Is hotel pickup available?
The pickup information is unclear. The stated meeting point is Brooke Street Pier, and hotel drop-off is not available. Confirm pickup directly before relying on it.
Can I bring a stroller or use a wheelchair?
No. The activity is not stroller-accessible or wheelchair-accessible.
What happens if the tour is cancelled or I need to cancel?
If the operator cancels because of unforeseen events or extreme weather, you can reschedule or request a full refund. You can get a full refund if you cancel at least 24 hours before the activity date, based on local time. Late arrivals and no-shows are not refundable.